Understanding Sections and Blocks
Sections and blocks are the foundational building elements your theme provides to help you design and customize your Shopify store—no coding required.
➕ Adding Sections
A section represents a major content area on a page (e.g., a hero banner, product grid, or newsletter signup).
-
Shopify enforces a hard limit of 25 sections per theme (not per page—across all templates). This is a platform-level restriction that cannot be increased.
-
To add a section:
- Open the Theme Editor (Online Store > Themes > Customize).
- Scroll to the bottom of the page.
- Click “Add section”.
- Choose a section from the list and click to insert it.
📌 Tip: Not all sections are meant for every page. Some are designed specifically for the homepage, product pages, or collections.
🔄 Reordering Sections
You can rearrange sections to control the layout flow:
- Hover over the section you want to move.
- Click and hold the six-dot icon (⋮⋮) on the left side of the section header.
- Drag the section to its new position.
- Release to drop it in place.
🗑️ Deleting Sections
To remove a section:
-
Select the section in the Theme Editor.
-
Click the “Remove section” button at the bottom of the section settings panel.
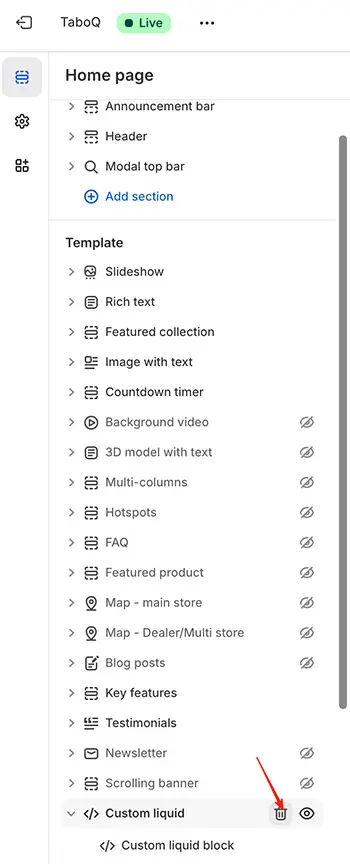
⚠️ Warning: Deleted sections cannot be recovered. If you only want to hide a section temporarily (e.g., for a seasonal campaign), click the eye icon 👁️ next to the section name instead. This toggles visibility without deleting it.
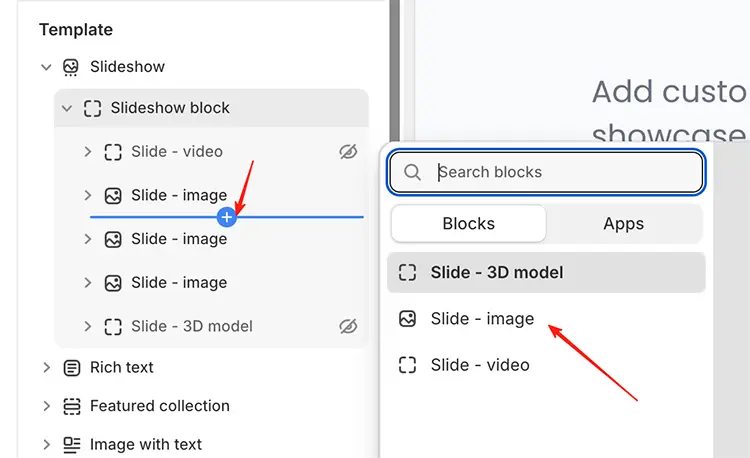
🧱 Managing Blocks
Some sections support blocks—reusable sub-elements that let you add multiple instances of similar content within a single section.
Examples:
- A slideshow section uses blocks for individual slides.
- A featured content section might use blocks for cards or testimonials.
- A product grid section could use blocks to highlight specific items.
Working with Blocks:
-
Add a block: After selecting a block-enabled section, click “Add block” and choose the type.
-
Reorder blocks: Use the six-dot drag handle next to each block.
-
Remove a block: Click the trash can icon or “Remove” button on the block.
⚠️ Block Limits Are Intentional
Each page can have a maximum of 25 sections, and each section can have a maximum of 50 blocks. These limits exist for two key reasons:
1. Performance
Too many blocks increase page weight and slow down load times—hurting both user experience and SEO.
2. User Experience & Conversion
Research shows users rarely engage with content beyond the first few items. For example:
- Most customers won’t wait to see slide #9 in a slideshow.
- Long, repetitive sections dilute focus and reduce conversion rates.
✅ These constraints are based on real-world e-commerce data—not arbitrary rules. Working within them often leads to better-performing stores.
💡 Best Practice Reminder
- Use sections strategically, not excessively (aim for 10–15 per page).
- Leverage blocks to repeat content efficiently, but respect built-in limits.
- When in doubt, simplify—clarity drives conversions.
Need advanced customization? Consider hiring a Shopify Expert for tailored solutions that respect both design and performance best practices.